
Here is a totally new column in English, dealing on how-to’s and published weekly every Thursday.
Arduino IDE is the software used to create Arduino projects. The hardware section of the Arduino board is accompanied by an open source (as in free) multiplatform (i.e. compatible with any operating systems) integrated development environment. The IDE is an integrated development, editing and compilation system similar in use to Code Block or Visual Studio, that runs on your PC. It allows you to write, compile and load software programs (called sketches) on your Arduino board (working with virtually any type of Arduino-compatible board) in a very simple and intuitive way.
The programming language of choice to write code comes from C and C ++. As high-level languages, they use a “lexicon” very close to the language spoken by man.
The text editor has some nice peculiarities, such as syntax highlighting, parenthesis control and automatic indentation.
Clic here to download the latest version of the Arduino IDE software.
The software is quite self-explanatory in use. Arduino IDE is made up of three areas.

The lower part (black background) constitutes the “build message”, the area where errors or information relating to the upload are reported.
The wide central part (with a white background) is the area where you will write your own sketch.
The upper side is composed of the menu to access the various functions offered by the software. The upper interface is defined by five buttons and five areas.
The function of the buttons (starting from left to right) is as follows:
- Verification: allows you to verify if your sketch is both syntactically and lexically correct.
- Upload: allows you to upload the sketch to your Arduino board. In case of errors related to the syntax or code lexicon, the loading operation will not be carried out.
- New: allows you to create a new file.
- Open: allows you to open files on your PC.
- Save: allows you to save the sketch.
The function of the five areas (starting from left to right) is as follows:
- File: allows you to create a new file, open an existing file or save and close the sketch you are writing, or access the software settings menu. A nice feature consists in accessing a folder containing example sketches with an explanation of how libraries, commands and functions work. In addition there is the possibility to print your own sketch directly.
- Edit: allows you to edit your sketch through typical features such as copying, cutting, pasting, finding a certain word and so on.
- Sketch: allows you to upload, compile, verify and export your sketch. A very important feature is the integration of external libraries.
- The tools menu is composed of the following features:
-
- Automatic Formatting: tool that “rearranges” the lines of code by ordering them with a layout that is easier to read and understand.
- Archive sketch: allows you to save your sketch inside a compressed file.
- Correct encoding and reloading: update the code with the current editor version and reload the code.
- Serial monitor: displays the serial data sent by the Arduino board (USB or serial board).
- Serial plotter: displays the serial data sent by the Arduino board (USB or serial board).
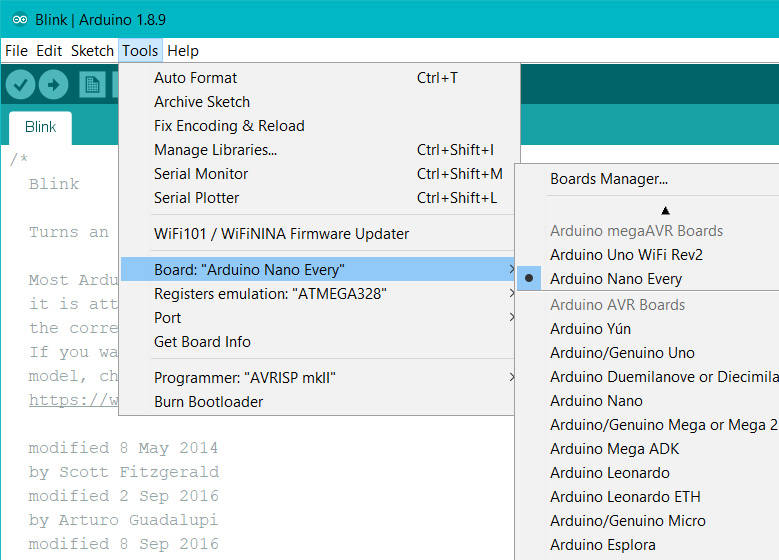
- Board: allows you to select the type of Arduino or Arduino-compatible physical board you will be programming on.
- Serial port: this menu contains all the serial devices (real or virtual) available on the PC.
- Acquire board information: view the specifications of the board used.
- Programmer: the elements of this menu allow you to write a bootloader on the microcontroller of the Arduino board. This is not required for normal use of an Arduino board, but is useful if you are purchasing a new, uninitialised ATmega.
- Write the Bootloader: allows the bootloader to be loaded on a standalone Arduino
-
- Help: contains a series of links referring to the FAQ and the troubleshooting of the most common problems in using Arduino.
In the next articles we will give new hints about the use of libraries, variables and how to implement the if iteration, the for, while, do while loop and so on.
Useful links:
Follow us to keep yourself updated with the news!
Simone Candido
Simone Candido è un ragazzo appassionato del mondo tech nella sua totalità. Simone ama immedesimarsi in nuove esperienze, la sua filosofia si basa sulla irrefrenabile voglia di ampliare a 360° le sue conoscenze abbracciando tutti i campi del sapere, in quanto ritiene che il sapere umano sia il connubio perfetto tra cultura umanistica e scientifica.